Who is this article relevant to?
This article is for anyone who wants to know how to assign a static IP to their computer to avoid the need to setup their Rokoko devices every couple of weeks.
Introduction
Have you come across the issue where after some time of not using your Rokoko gear, you plug them to a powerbank and they do not appear in the Studio scene right away?
This happens because most likely the IP of your computer has changed. All routers change the IP of the devices connected to them every couple days or weeks.
If this has happened, we need to set up the WiFi settings of the Rokoko gear we are using again by using the new IP from the Receiver IP menu.
However, we can make some small changes and keep the change from happening.
NOTE: the change of the IP can still happen if you use another network adapter, router or if the router you are using is reset.
Windows Solution
For this example, we are going to use:
- an ethernet adapter
- an offline dedicated router
- no gateway IP (the IP used to connect your router to the internet - this is basically the router's IP used to "talk" with the outer world)
Useful - You can do the above on your online router too, but make sure to include:
- a gateway IP. Can be found here.
- a DNS server (use the same gateway IP from above).
- an alternative DNS server (you can use 8.8.8.8 which is Google's DNS server).
- Connect the offline router to the PC via ethernet using the LAN port on the back of the router.
-
Go to
Control Panel\Network and Internet\Network Connections
or
Control Panel\Network and Internet\Network and Sharing Center > Change adapter settings
from the left side list
Right-click the Ethernet adapter that you are using for the offline router (the name of the Access Point/Wifi name should be visible under the adapter) and click Properties
-
Select the Internet Protocol Version 4 (TCP/IPv4) and click Properties
- In the General tab click Advanced
- Find the Ethernet IP of your PC as shown here
-
Enter that IP in the IP address as shown below.
Your IP should be different than the one used here.
The subnet mask will autofil. - Click OK
MacOS Solution
Here’s how to set a static IP address in macOS. More on this here.
- If you own a MacBook, you may want to create a new network location. This will allow you to use the static IP address for certain networks and not others. See How to Configure Network Locations in OS X for instructions.
- From the Apple menu, select System Preferences.
-
Select Network. The window shown below appears.
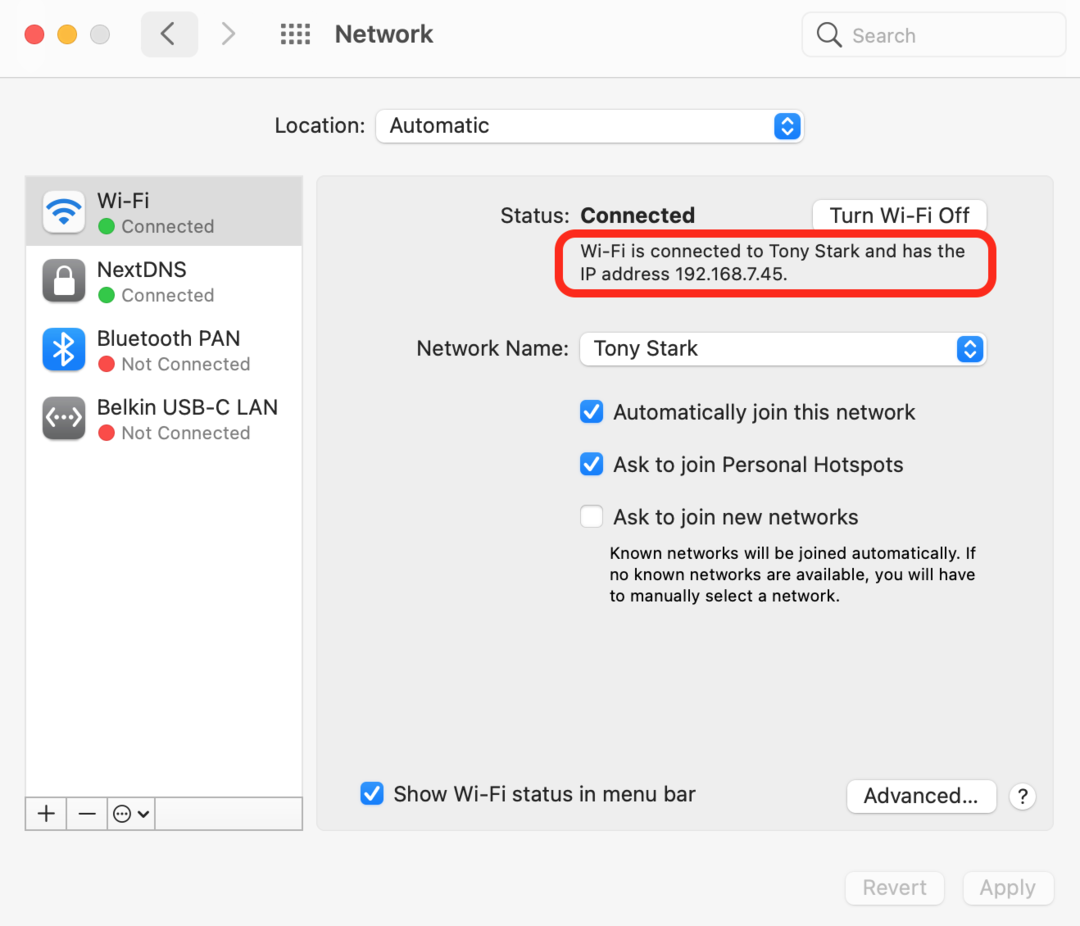
- From the sidebar, select an active network interface. In this example, I’m connected to a wireless network, so I’ll select Wi-Fi.
- Make a note of the current IP address assigned to your Mac. You’ll need to select a new IP address from within the private IP address range listed. More on that in a minute.
- Click Advanced.
-
Select TCP/IP. The window shown below appears.
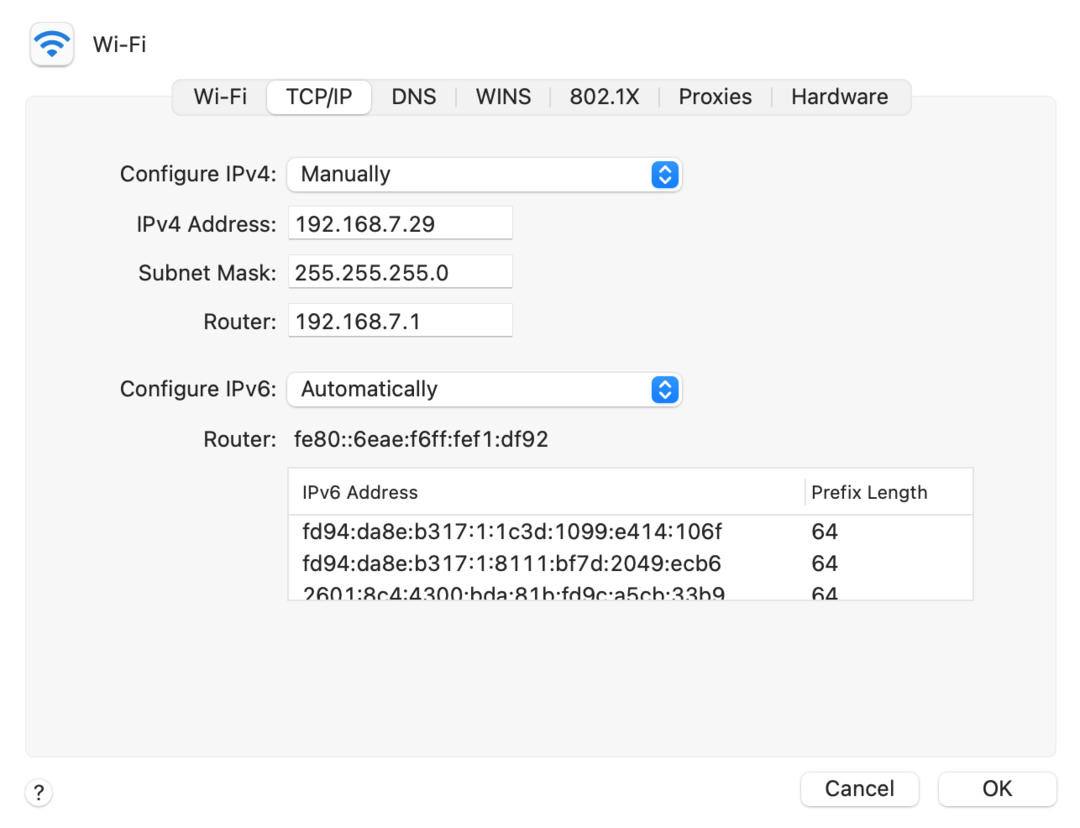
- From the Configure IPv4 menu, select Manually.
- Enter a static IP address in the IPv4 Address field. What number should you enter? One method is to take your current IP address and change the last part of the number. In this example, I could have picked any address between
192.168.7.0and192.168.7.255, as long as the address was not already assigned to another device.